
A useful survival garden is not one fixed shape. The best layout is the one that matches your sunlight, water access, soil, available space, physical reach, growing season, and the way you actually plan to eat or preserve the harvest.
Think of a backyard food garden as a resilience layer rather than a guarantee of complete food self-sufficiency. A small garden can supply fresh greens, herbs, tomatoes, roots, and seasonal produce, while a larger plot can devote more room to storage crops, succession planting, perennials, and crop rotation.
Quick comparison: which survival garden layout fits your yard?
The 13 layouts below solve different problems. Use the table as a first filter, then use the interactive experience to narrow the choices around your actual site and priorities.
| Layout | Best for | Main advantage | Main watch-out |
|---|---|---|---|
| 1. Compact grid bed | Small sunny yards | High variety in little space | Crowding and shade |
| 2. Twin rotation beds | Beginners who want structure | Simple crop-family movement | Limited rotation choices |
| 3. Four-bed rotation block | Medium yards | Clear yearly rotation | Needs more path space |
| 4. U-shaped access bed | Reduced bending or reach | Work from the perimeter | More edging to build |
| 5. Vertical side-yard strip | Narrow spaces | Uses fences and trellises | Shade can be severe |
| 6. Traditional row plot | Large open ground | Easy access for bulk crops | Paths use more area |
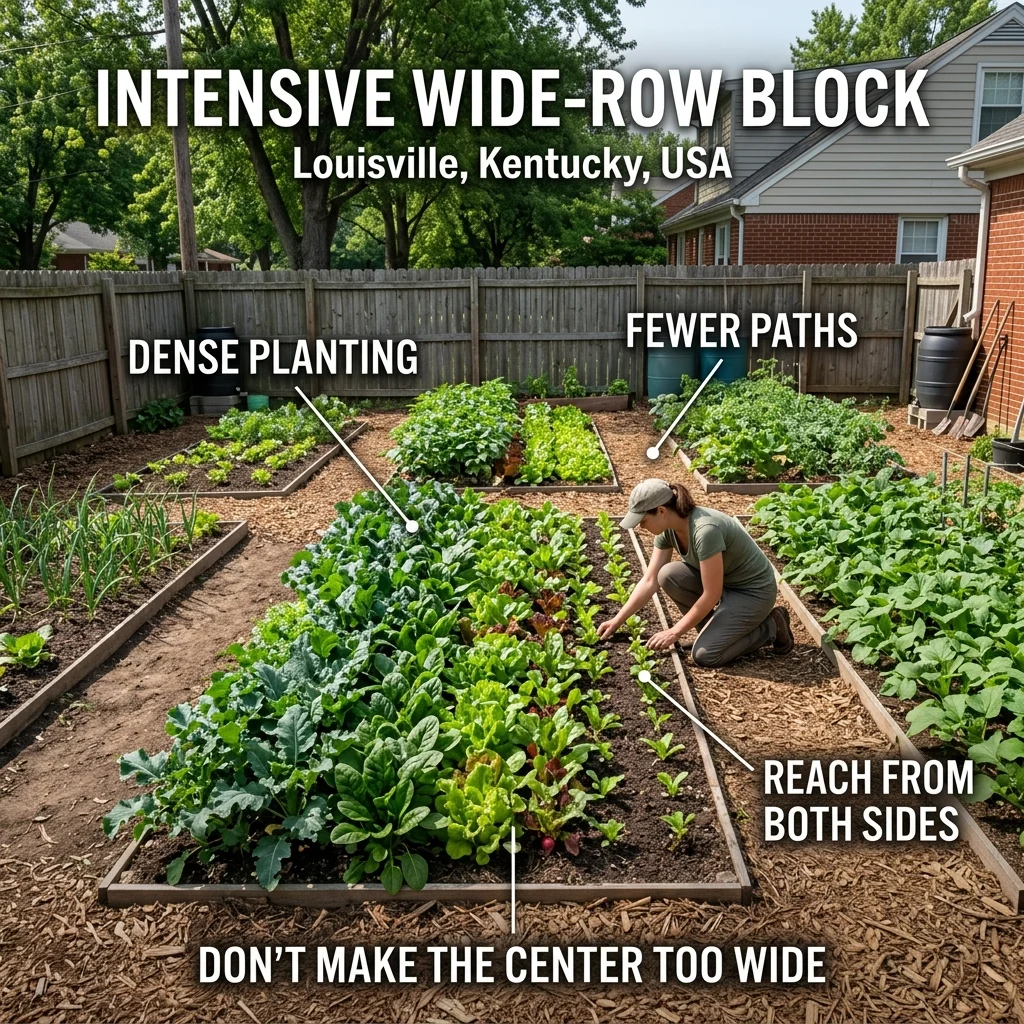
| 7. Intensive wide-row block | Medium plots | Less space lost to paths | Center must remain reachable |
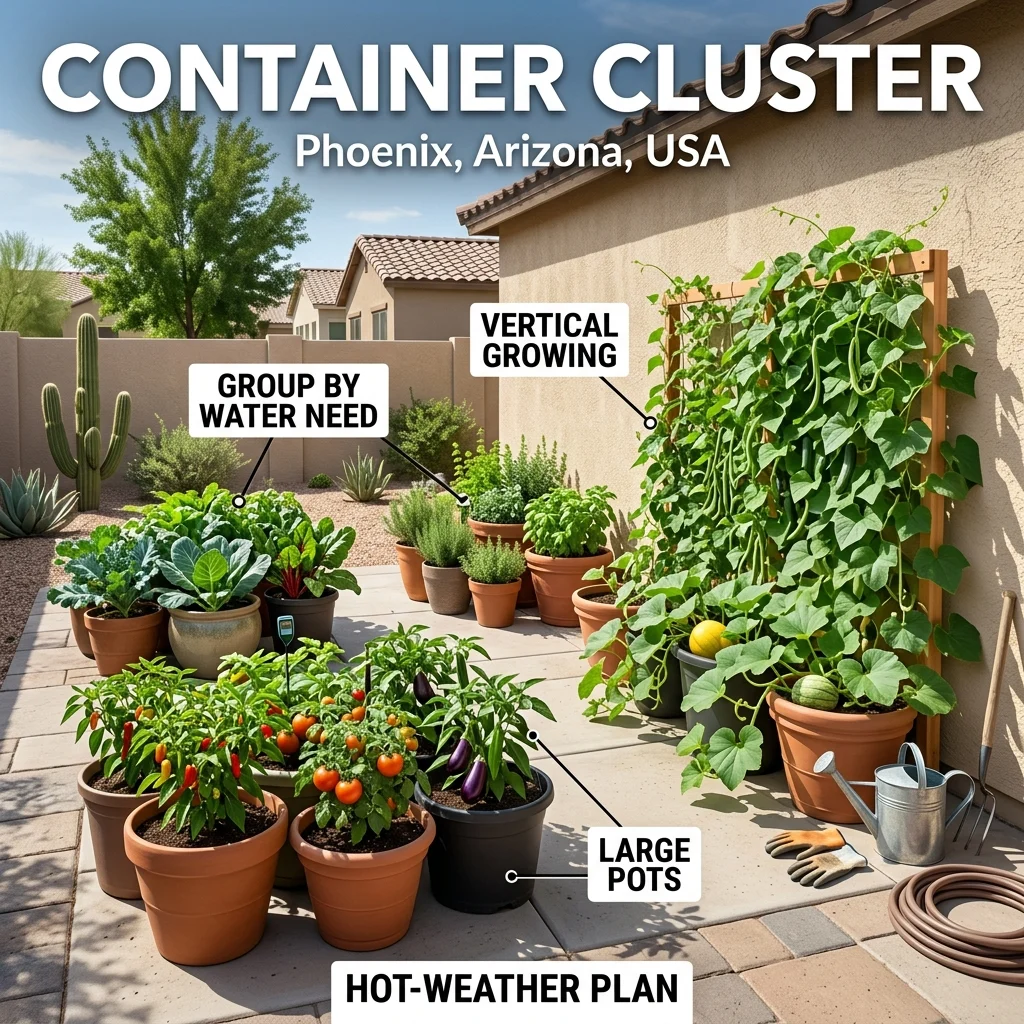
| 8. Container cluster | Patios and poor soil | Portable and modular | Dries out faster |
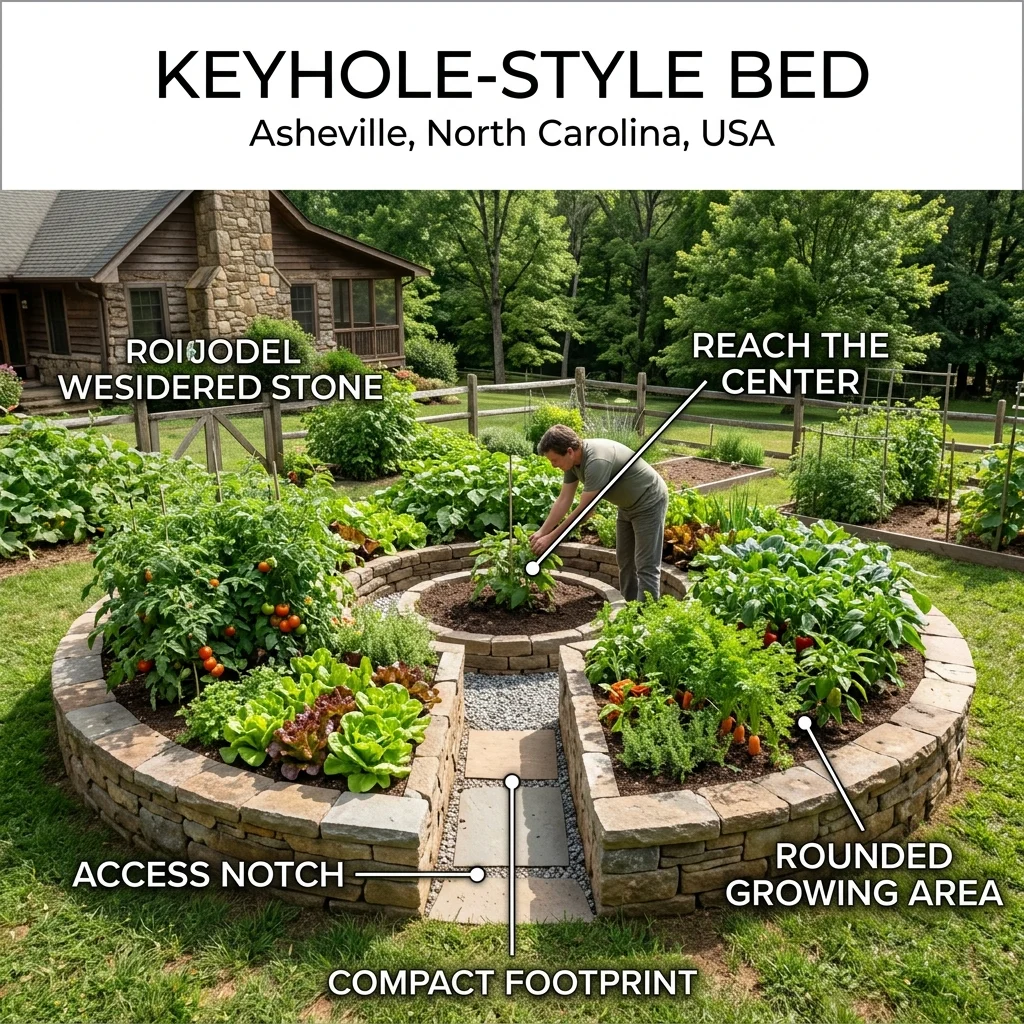
| 9. Keyhole-style bed | Compact circular sites | Short walking distance | Performance depends on climate and build |
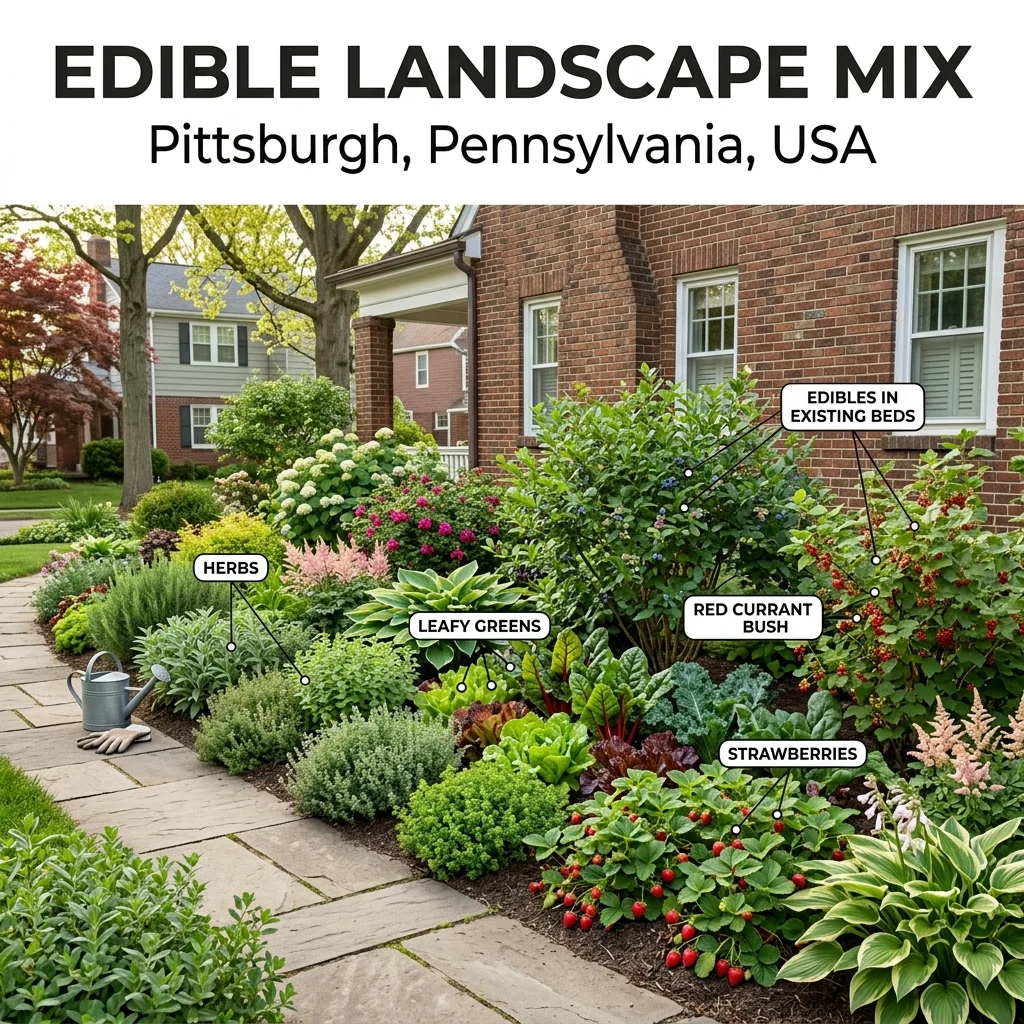
| 10. Edible landscape mix | Existing ornamental yards | Adds food without one big plot | Scattered maintenance |
| 11. Perennial food-forest edge | Long-term resilience | Fruit, shrubs, herbs and perennials | Takes years to mature |
| 12. Storage-crop zone | Preserving and cool storage | Harvest can last beyond the season | Needs crop-specific curing/storage |
| 13. Mixed resilience hub | Larger committed gardens | Combines fresh, storage and perennial food | More planning and maintenance |
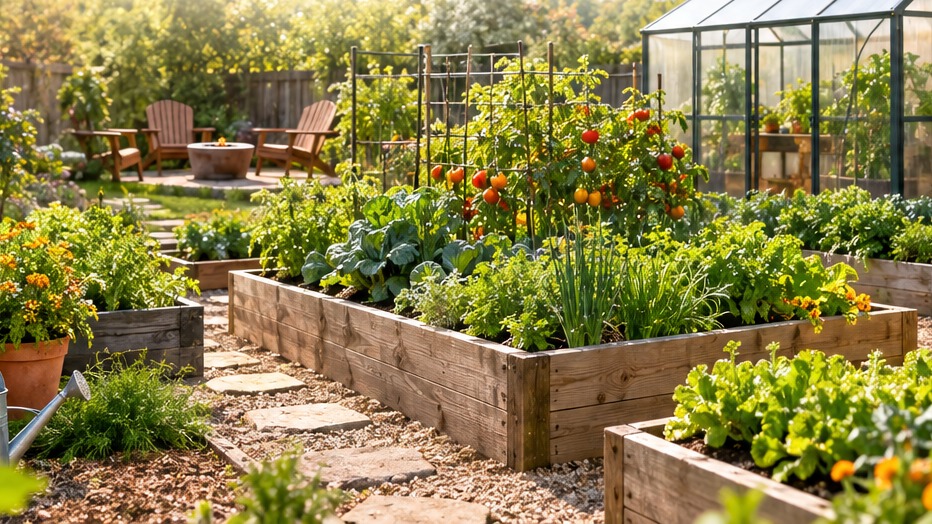
Choose the layout around the site
Harvest Resilience Studio
Match space, sun, soil, water, access and harvest goals to practical garden layouts without fake yield promises.
Your site
Describe the conditions that change the layout
Use approximate conditions. The result is decision support, not a yield forecast.
Your result
Layouts that fit the conditions you entered
These are ranked by transparent site-fit rules. They are not predicted yields.
Local checks before you build
Confirm planting dates, soil testing options and crop recommendations for your climate.
A garden can improve household food resilience, but this experience does not estimate complete dietary self-sufficiency, emergency calories, or guaranteed harvest volume.
Six checks before you copy any garden layout
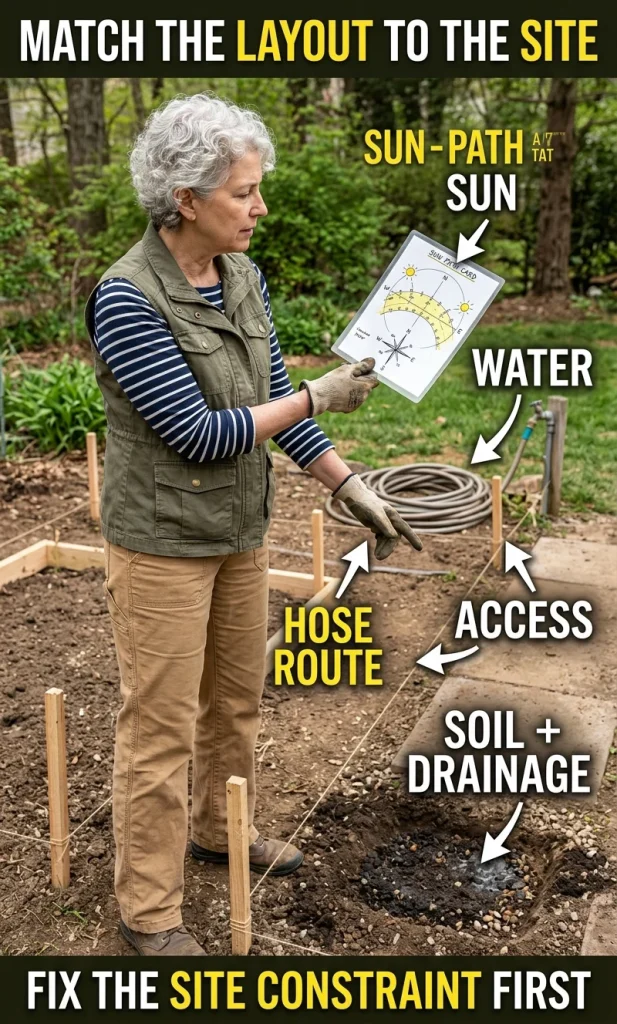
Site conditions control the result more than the drawing does. University of Illinois Extension recommends prioritizing location, drainage, water access, and adequate sun when planning a vegetable garden, while also keeping tall crops from shading shorter ones unnecessarily. Its home vegetable gardening guidance is a useful baseline before you build beds or buy plants.
- Sun: Fruiting crops usually need the brightest part of the yard, while some leafy crops tolerate less direct sun. Map the real summer sun pattern before committing permanent beds.
- Water: Put the most water-dependent beds close to a hose, drip line, or reliable stored-water source. A theoretically efficient garden becomes fragile if watering it is a daily hauling job.
- Soil and drainage: Use in-ground rows where the soil is workable and drains well; use raised beds or containers when compaction, contamination concerns, roots, or poor drainage make the ground unsuitable.
- Reach and paths: Design bed width around the person who will maintain it. If you have to step into the bed to weed or harvest, the layout is too wide for the way you work.
- Harvest purpose: Fresh salad crops, preserving crops, storage crops, and perennial fruit use space differently. Choose the harvest goal first, then allocate bed area.
- Time: A garden with many small mixed plantings may produce variety but also creates more irrigation, succession, trellising, harvesting, and record-keeping work.
Keep a simple sketch or garden journal so you know what grew where, when it was planted, what failed, and which pests appeared. That record makes next season’s crop rotation and succession plan much more useful than relying on memory.
13 survival garden layouts and when each one works
1. Compact grid bed
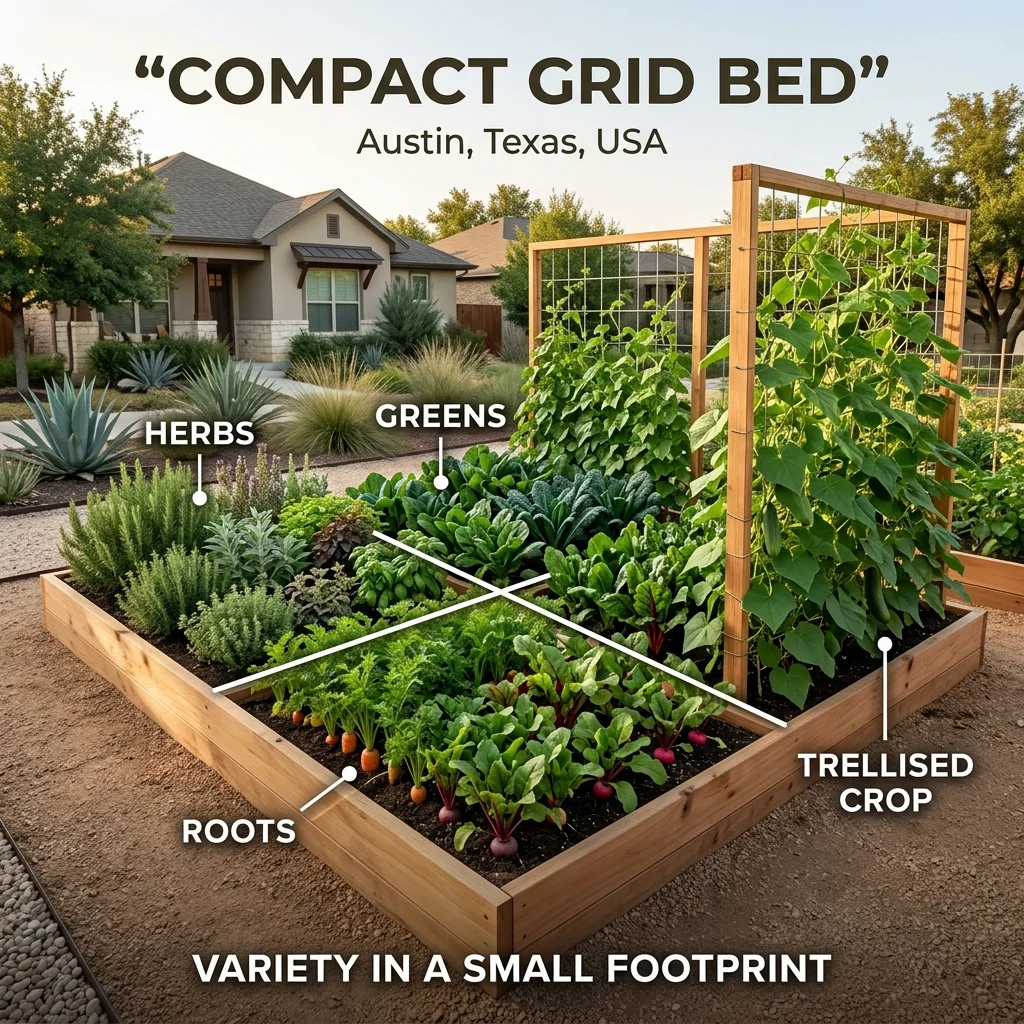
A compact grid bed divides a small raised bed into repeatable planting zones, which makes it easy to mix quick crops, herbs, roots, and one or two larger plants. This is a strong fit for a small sunny yard where the goal is variety and frequent fresh harvests rather than bulk storage.
The main failure mode is treating every square as if plants stay small. Tomatoes, squash, cucumbers, and other vigorous crops can shade or overrun neighboring zones, so use real mature spacing from seed packets or local extension guidance and place trellised crops where their shade will do the least harm.
2. Twin rotation beds
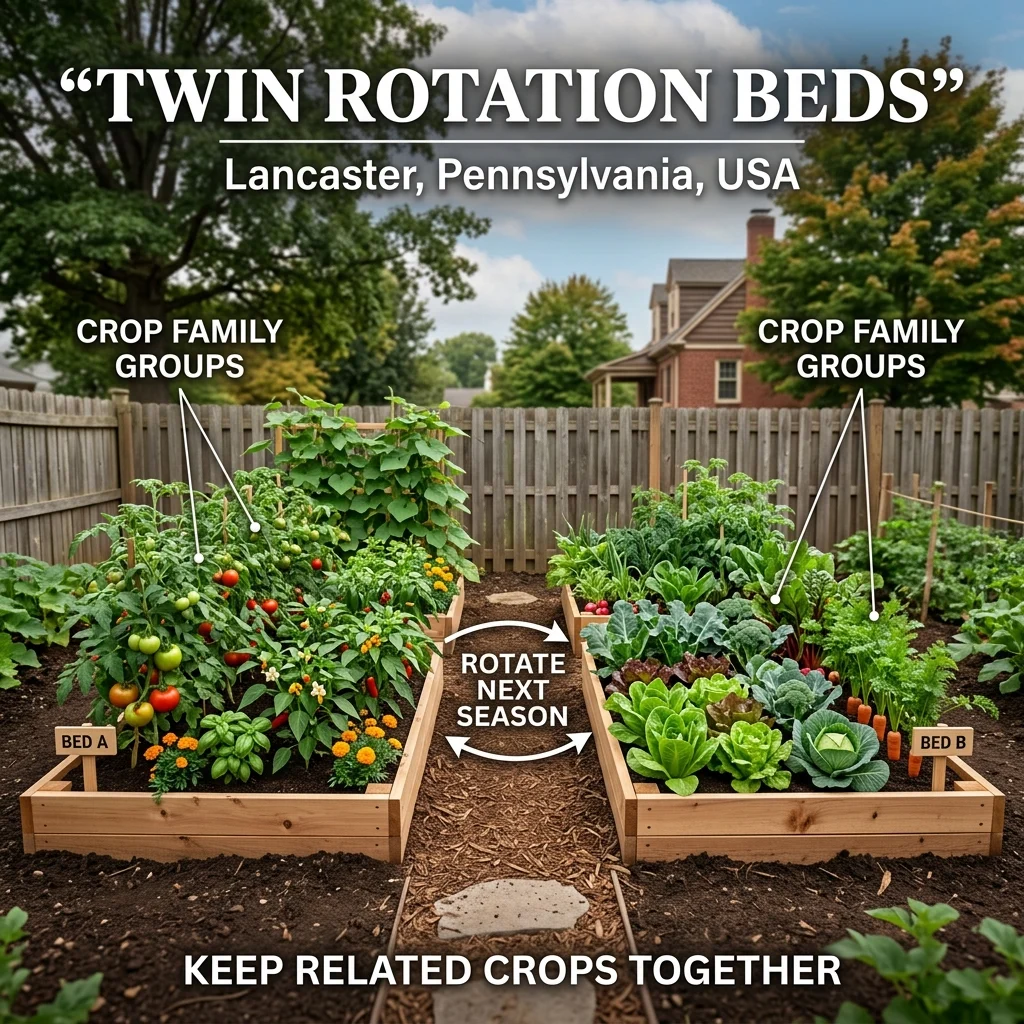
Two matching beds are easy to build, easy to irrigate, and easier to rotate than one permanent mixed bed. You can keep crop families together, then switch broad groups between beds the next season while adjusting for pests, disease history, and plant-family relationships.
Crop rotation helps reduce the repeated buildup of certain pests, diseases, and nutrient imbalances, but two beds do not create a perfect multi-year rotation by themselves. Penn State’s home-garden crop rotation guidance explains why moving related plant families matters, not merely moving individual vegetables.
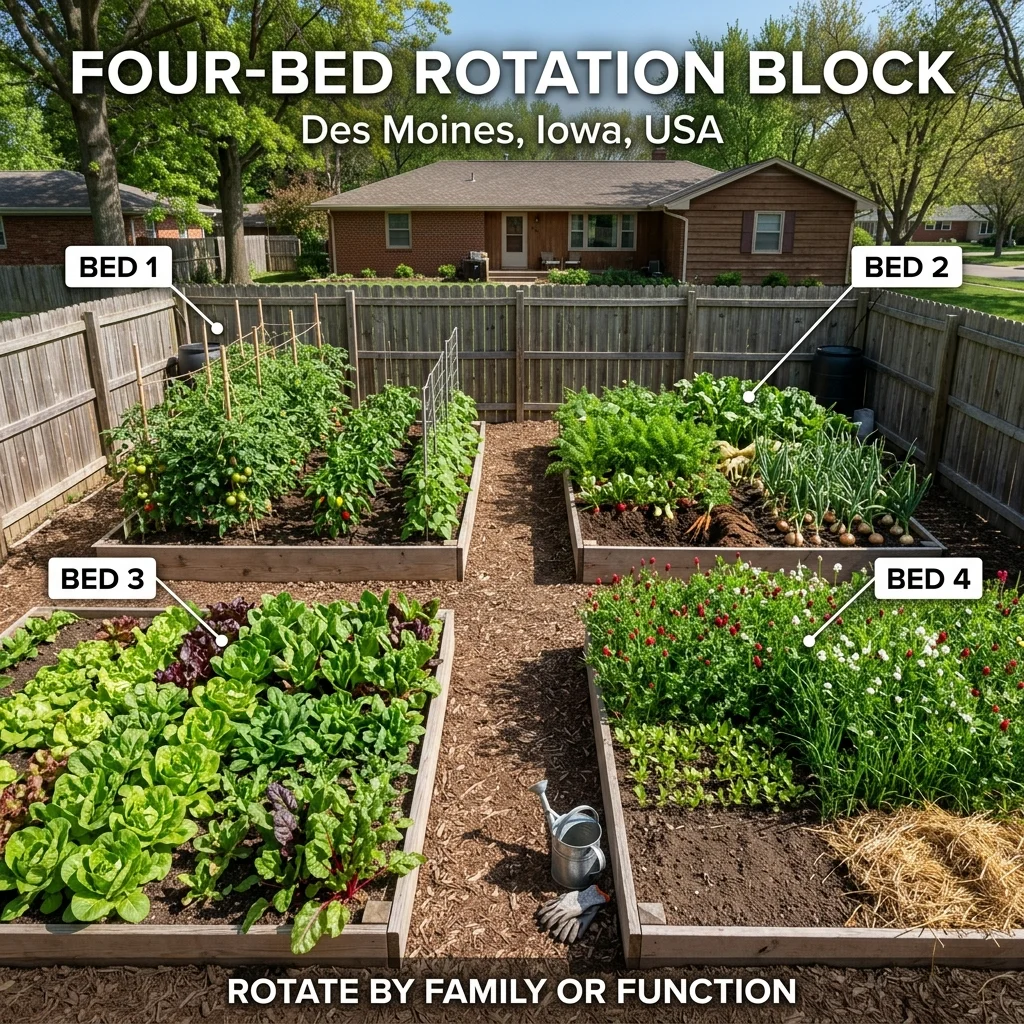
3. Four-bed rotation block
A four-bed block gives you enough separation to dedicate areas to broad crop families or functions, then rotate them through the system. It also makes it easier to reserve one bed for quick greens or cover crops while the others carry fruiting, root, or storage crops.
The cost is path area and construction. If your total yard is small, four undersized beds separated by generous paths may produce less usable growing area than two wider but still reachable beds, so measure the whole footprint before deciding that more beds automatically means more food.
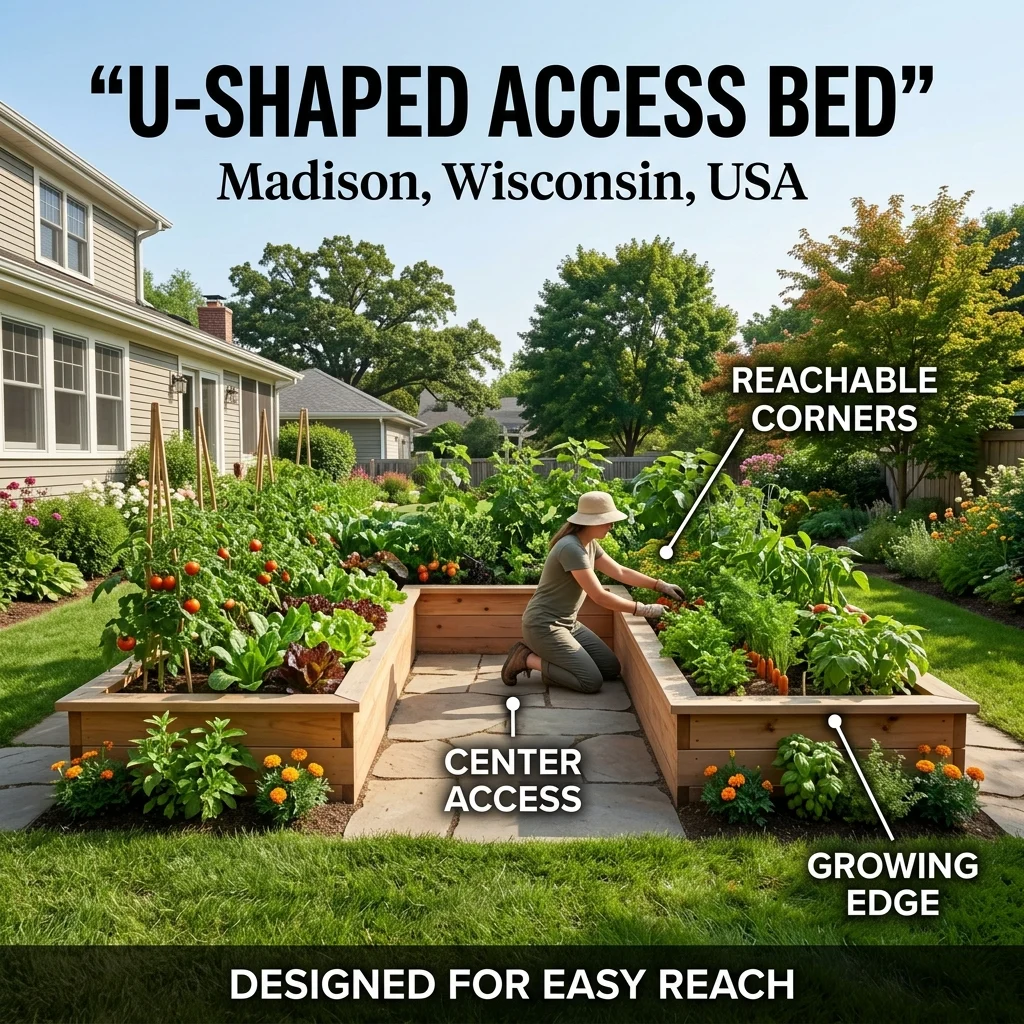
4. U-shaped access bed
A U-shaped bed brings more growing edge within reach and can reduce bending or long walks around a garden. It works especially well when the gardener needs a central standing area, stool space, or a short path from several sides.
Keep the inside of the U wide enough to turn comfortably and keep corners reachable. If wheelchair or walker access is required, design path width, surface stability, bed height, and turning clearances around the actual mobility device rather than copying a decorative U shape from a photo.
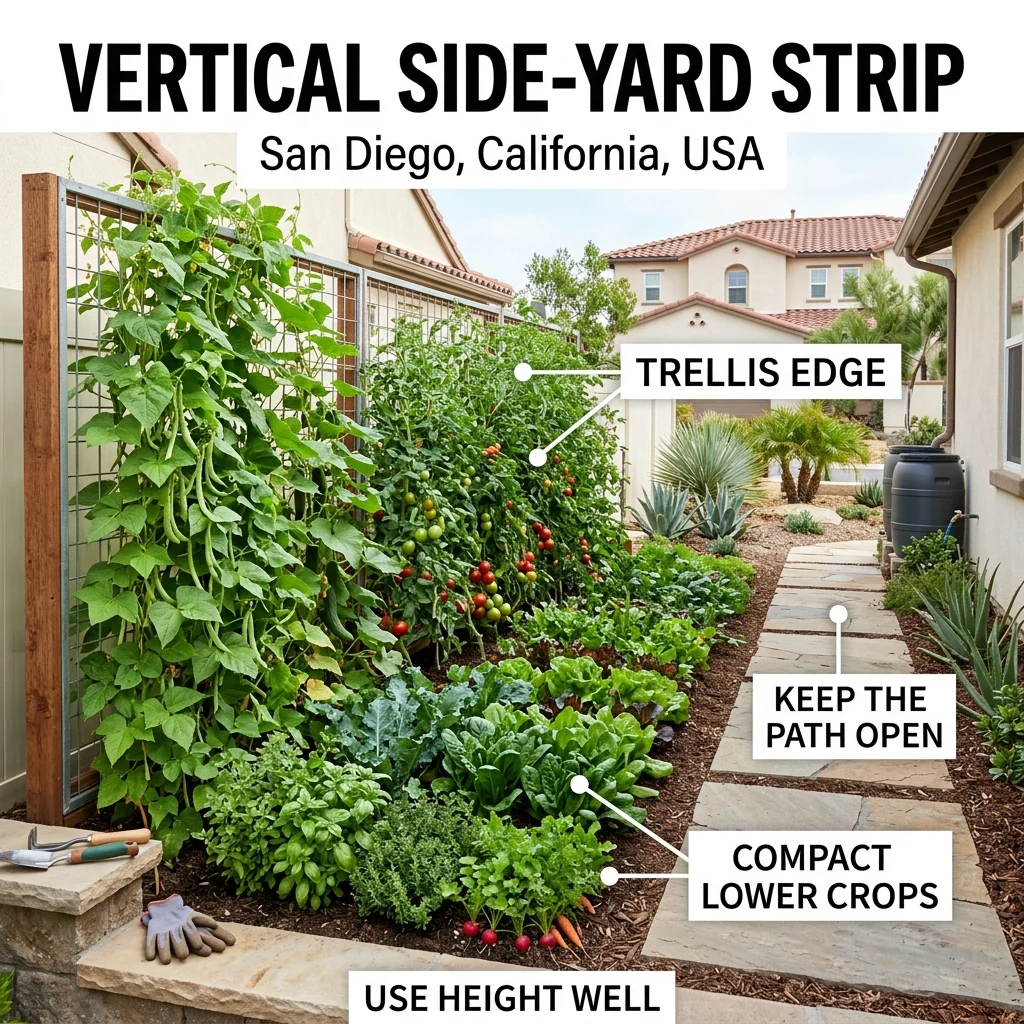
5. Vertical side-yard strip
A narrow side yard can become productive when the sunny edge carries trellised beans, cucumbers, peas, or trained tomatoes and the lower edge carries compact crops. The layout is efficient because it uses height instead of asking sprawling vines to occupy the path.
Shade is the deciding condition. A side yard between buildings may look bright but receive too little direct sun for fruiting crops, so observe the site across the day and season before building permanent trellises.
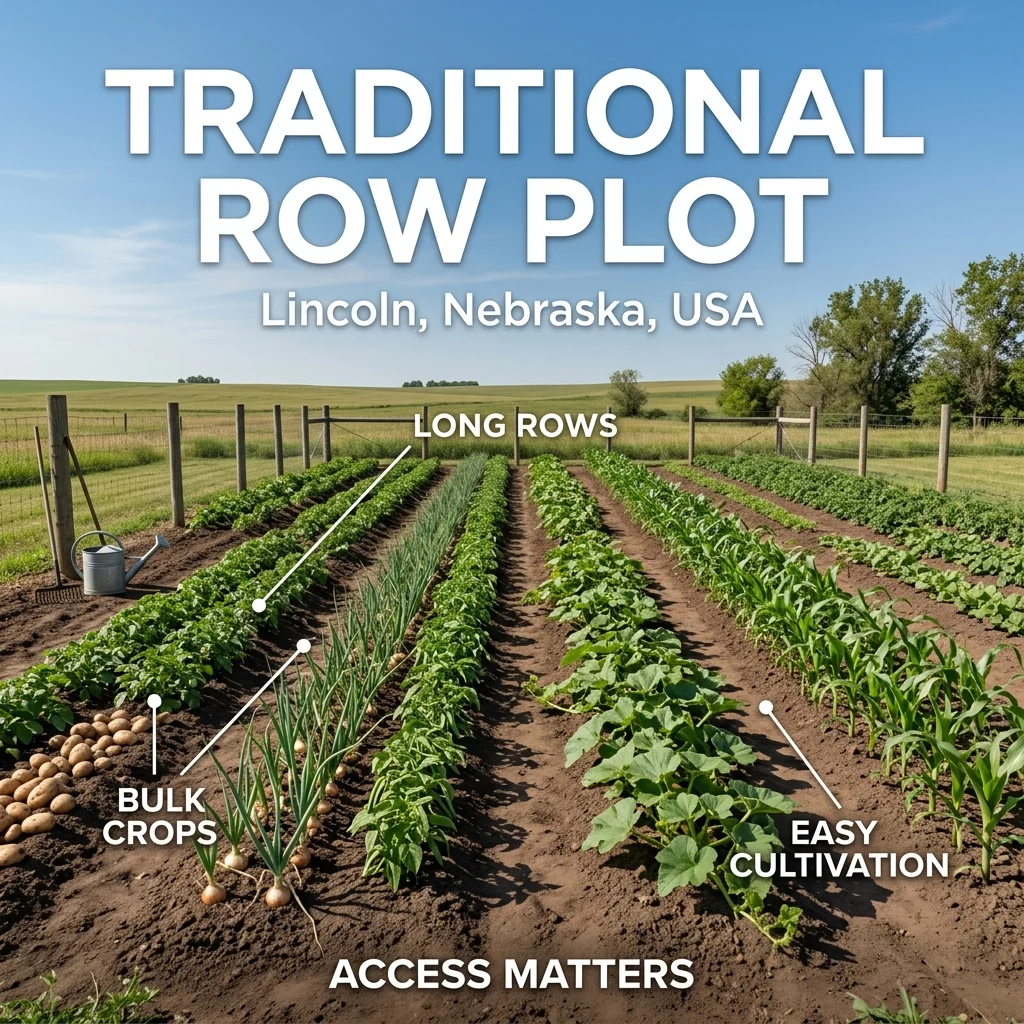
6. Traditional row plot
Long rows still make sense when you have a larger open site and want to grow larger quantities of potatoes, corn, beans, squash, onions, or other crops that are easier to cultivate and harvest in repeated runs. Rows also make hoeing, mulching, irrigation lines, and crop-family tracking straightforward.
The trade-off is land devoted to walking and machinery access. If you are hand-tending a modest backyard, wide-row or bed systems may use the footprint more efficiently, but traditional rows remain practical when access and bulk production matter more than maximum planting density.
7. Intensive wide-row block
Wide-row planting groups crops in bands or blocks instead of single narrow rows, reducing the number of paths. It suits a medium garden where you can reach the block from both sides and want a dense planting of greens, roots, onions, bush beans, or similar crops.
Do not make the block so wide that the center becomes unreachable. Reaching across foliage to weed or harvest compacts the edge, damages plants, and turns a space-saving layout into a maintenance problem.
8. Container cluster
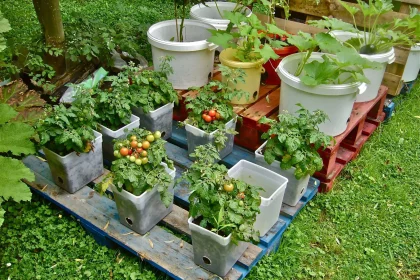
Containers are the most flexible layout when the ground is paved, contaminated, root-filled, rented, or simply unavailable. Group containers by watering needs, place large pots where they will not shade smaller ones, and use trellises against the brightest wall or fence when vertical growth is practical.
Containers lose moisture faster than in-ground soil and need dependable drainage. If you are building a resilience garden around containers, the irrigation plan matters as much as the plant list because a hot week can stress a patio garden quickly.
9. Keyhole-style bed
A keyhole-style bed uses a circular or rounded planting area with a narrow access notch so the center can be reached without walking on the soil. It can be useful where a compact footprint, short path, or visually contained bed works better than a rectangle.
Some keyhole designs include a central compost basket or layered fill, but do not assume that feature will automatically irrigate or fertilize the entire bed. Climate, soil mix, decomposition, rainfall, and construction details change how the system behaves, so treat the shape and access benefit as the reliable part of the concept.
10. Edible landscape mix
An edible landscape spreads food plants through existing borders, containers, and ornamental beds instead of building one separate vegetable plot. Herbs, leafy vegetables, strawberries, fruiting shrubs, and other compatible edibles can fill sunny gaps while leaving the main bed available for crops that need more space.
This approach is especially useful when the yard already has established beds. Penn State notes that edible plants can be integrated into perennial beds, herb gardens, and containers when light, moisture, drainage, fertility, and growth habits are compatible; its edible landscape guidance explains the design logic.
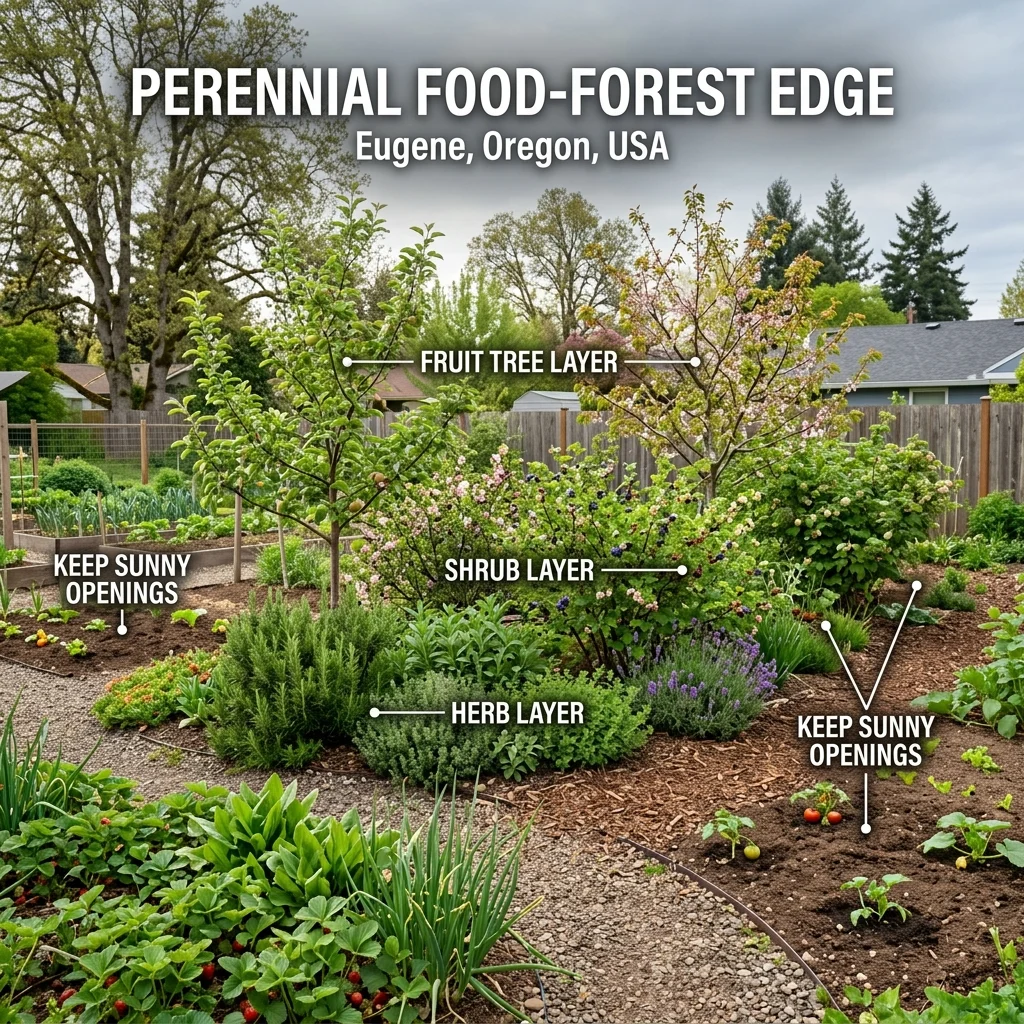
11. Perennial food-forest edge
A perennial edge combines fruit or nut trees where climate and space permit with shrubs, perennial herbs, groundcovers, and annual crops in the sunnier openings. The strongest advantage is time: once established, perennial layers can produce for years without replanting the entire area every season.
The weakness is the establishment period and eventual shade. Plan mature plant size from the beginning, keep enough access for pruning and harvest, and avoid placing future tree canopies where they will permanently darken the only good annual-vegetable site.
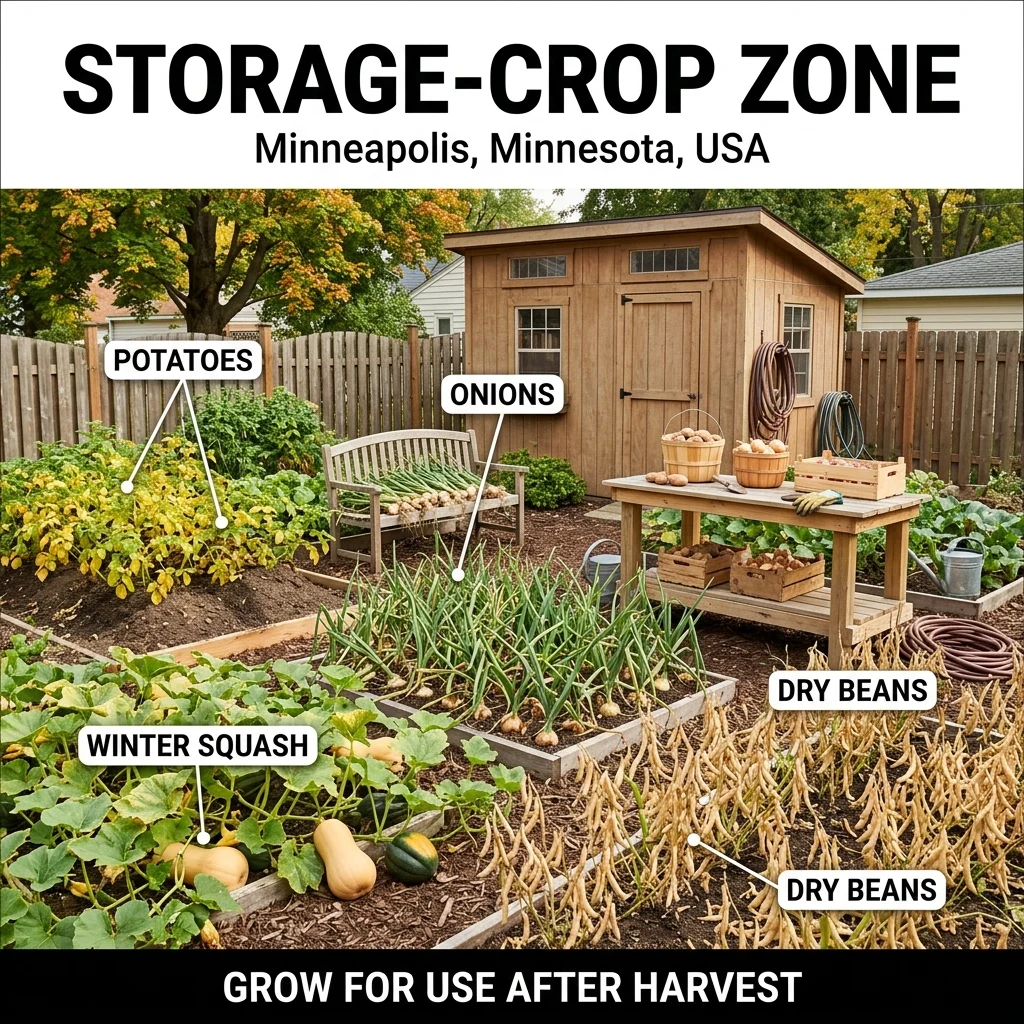
12. Storage-crop zone
If resilience means eating beyond peak harvest season, dedicate part of the garden to crops that can be cured, dried, frozen, canned safely, or stored under suitable conditions. Depending on climate and household preference, that may include potatoes, winter squash, onions, dry beans, roots, paste tomatoes, or other regionally appropriate crops.
Storage is crop-specific, not a generic pantry step. University of Minnesota Extension’s harvesting and storage guide shows how temperature, humidity, curing, and expected shelf life vary sharply between vegetables, while Penn State recommends planning the garden around how much you can realistically preserve and use.
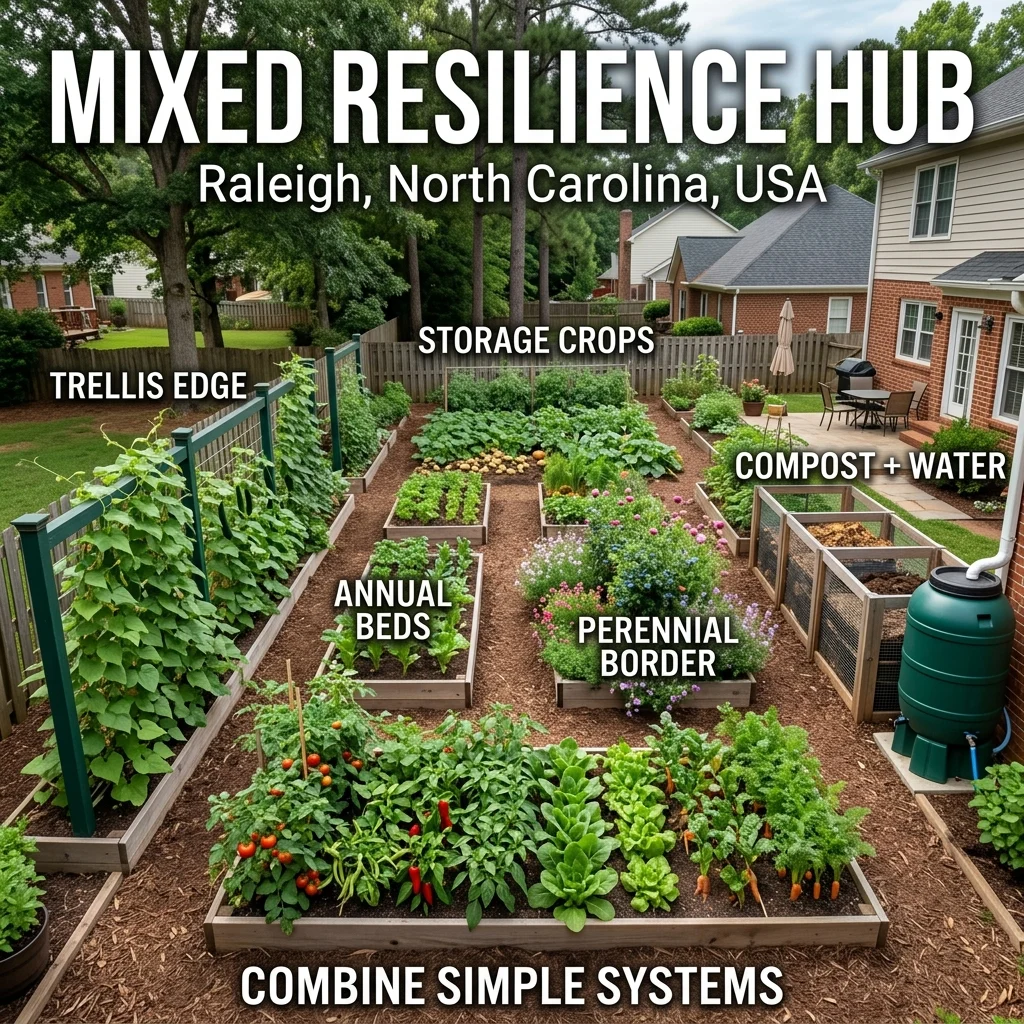
13. Mixed resilience hub
A mixed resilience hub combines several simple systems instead of forcing one bed style to do everything: annual raised or in-ground beds for fresh crops, a trellis edge for vertical crops, a storage-crop zone, a perennial border, nearby compost, and a reliable water point. This is the most adaptable layout when you have enough space and are willing to manage several harvest rhythms.
Keep the system modular. If one zone fails because of drought, pests, disease, or timing, the other zones still have a chance to contribute, and you can change one part next season without rebuilding the whole garden.
Fresh harvest, storage harvest, or calorie resilience?
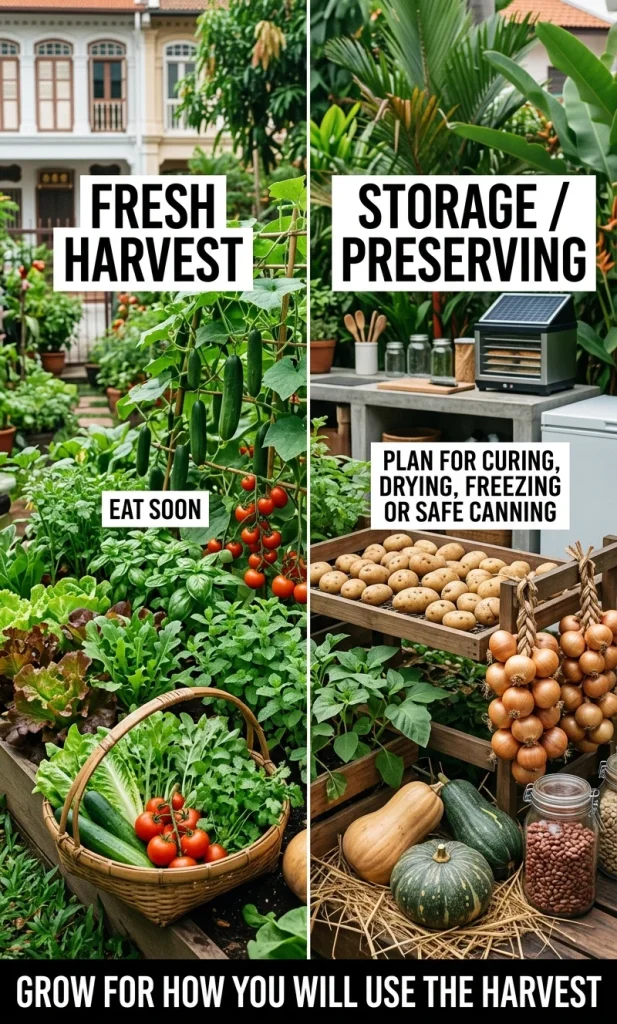
The phrase “survival garden” can mislead people into planting a beautiful mix of salad crops and assuming it equals a complete food supply. Leafy greens and herbs are valuable, but if your goal includes meaningful food resilience, the plan also needs crops you actually eat in quantity, a realistic harvesting schedule, storage or preservation capacity, and enough water to keep the system productive.
For preservation, start with the end use. Penn State’s preserving-focused garden guidance recommends choosing crop quantities and varieties around space, timing, household use, and the preservation method rather than simply growing as much as possible.
Design rules that make any layout more resilient
- Keep water close. Put the highest-demand beds nearest the water source and consider drip irrigation where practical.
- Keep every bed reachable. A dense layout only works if you can weed, inspect, harvest, and replant without stepping on growing soil.
- Use height deliberately. Put tall or trellised crops where they do not block the sun from shorter crops.
- Rotate related crops. Track plant families, not just individual crop names, when planning future beds.
- Use succession planting. Replant quick crops after harvest instead of leaving prime soil empty. Oregon State University Extension describes several succession methods for extending harvests across the season.
- Separate fresh and storage goals. Reserve space for crops you can realistically cure, dry, freeze, can safely, or store.
- Protect airflow and plant health. Overcrowding can raise humidity and disease pressure; University of Minnesota Extension recommends spacing, staking, mulching, and moisture management as part of disease prevention.
- Keep animal contamination in mind. Pets, poultry, and wildlife can introduce pathogens into produce-growing areas, so use barriers and clean harvest practices where needed.
Build the layout in this order
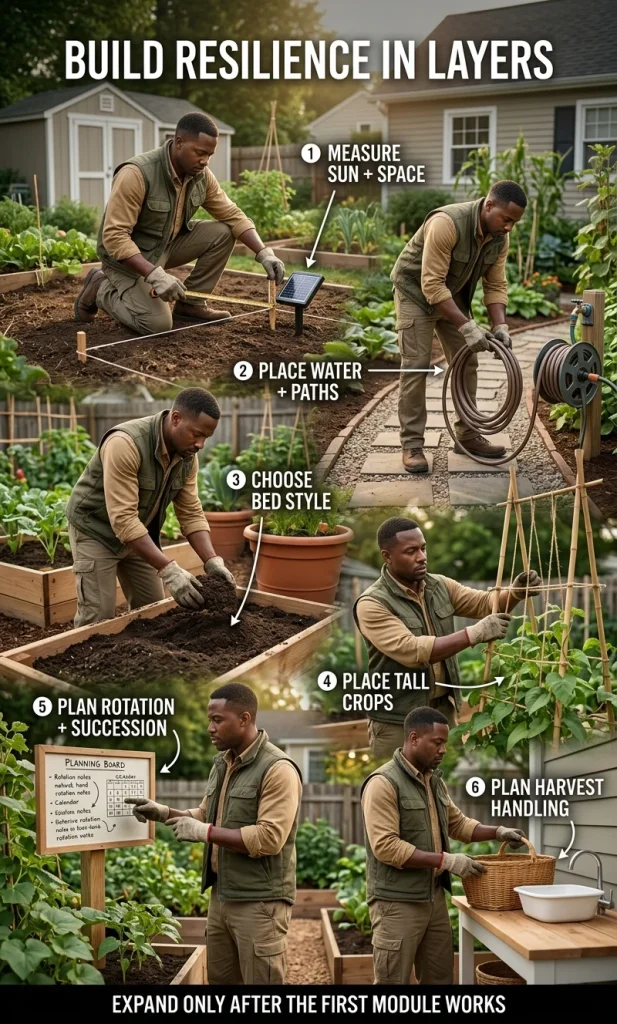
- Measure the usable sunny area. Include buildings, tree shade, utility access, slopes, and places that stay wet after rain.
- Choose the harvest goal. Decide how much of the garden is for fresh eating, preserving, storage, or perennial production.
- Place water and paths first. Make maintenance easy before maximizing planting area.
- Choose bed style. Use in-ground rows where soil and access are good; raised beds or containers where control and reach matter more.
- Place the tallest crops. Keep trellises and large plants from creating avoidable shade.
- Reserve rotation and succession space. Leave yourself somewhere to move crop families and somewhere to replant after quick harvests.
- Plan harvest handling. Know where produce will be washed, cooled, stored, frozen, dried, or preserved before the heavy harvest arrives.
If you are starting from bare ground, a small first-year system is usually better than an oversized layout you cannot water or maintain. You can expand a modular garden after one season of real records shows which crops your household uses and which parts of the site perform best.
Common survival garden layout mistakes
Overpacking the first season is the most common design error because seedlings look small when the plan is drawn. Leave mature spacing for large crops, keep paths functional, and treat seed-packet spacing as a starting point rather than assuming every intensive-gardening chart fits every variety.
Ignoring water logistics creates a garden that works only during mild weather. If the farthest bed needs repeated buckets during a hot spell, move that bed, improve irrigation, or reduce its water demand before adding more crops.
Growing only crops that peak at once creates feast followed by waste. Succession planting, early/mid/late varieties, and a mix of fresh and storage crops spread the work and the harvest.
Preserving without tested food-safety guidance can create real risk. Use current research-tested freezing, drying, pickling, and pressure-canning instructions for the specific food instead of improvising times, acidity, jar size, or processing method.
Survival garden layout FAQ
What is a survival garden?
A survival garden is better understood as a food-resilience garden: a home growing system designed to provide useful fresh food and, where space and skills allow, some storable or preservable harvest. It should complement stored food and normal food supply planning rather than be treated as a guaranteed standalone emergency diet.
Which layout grows the most food?
There is no universal winner because yield depends on sunlight, crop choice, spacing, soil, water, climate, pest pressure, and gardener skill. Intensive beds can use small spaces efficiently, while rows often make larger staple or storage crops easier to manage.
Are raised beds better than in-ground rows?
Raised beds are useful when you need better control over soil, drainage, reach, or path definition. In-ground rows are often cheaper and can be more practical for a large site with good soil, so the better choice is the one that removes your site’s main constraint.
What crops should go in a survival garden?
Grow crops your household already eats and that fit your climate. A balanced resilience plan often combines quick fresh crops, reliable high-use vegetables, some storage or preserving crops, and perennials where the site allows, instead of chasing a generic list of “survival foods.”
Can a very small yard still improve food resilience?
Yes. A small sunny area can produce herbs, greens, roots, peppers, tomatoes, climbing crops, and other high-use foods, especially with containers, trellises, and succession planting. The realistic goal is to add useful home-grown food, not to promise complete self-sufficiency from a tiny footprint.
How should I preserve a large harvest safely?
Match the preservation method to the crop and follow current research-tested directions for freezing, drying, pickling, water-bath canning, or pressure canning. Do not improvise processing times or acidity for low-acid vegetables.
Choose the simplest layout you can maintain well
A resilient garden is not the one with the most clever geometry. It is the one you can water, reach, rotate, inspect, harvest, and replant through the full season while producing food your household will actually use.
Start with one layout that solves your biggest constraint, then add a second layer only when the first one works. A compact bed plus a trellis, two beds plus rotation, or a row garden plus a storage-crop zone can be more dependable than an elaborate backyard system that demands more time and water than you can consistently give it.
For the next step, compare your space with how to build a DIY raised vegetable garden, refine the crop arrangement with how to create a kitchen garden plan, and review vegetable gardening for beginners before you buy more plants than the site can support.